Sadly, I had to stop producing and selling GIMX adapters, because it was taking too much time away from my other projects. However, I am leaving this blog up as documentation. The good news is that you can get up and running with GIMX these days without any soldering, or grueling Linux or Windows setup work. You can buy a USB adapter directly from the maker of GIMX, then buy a Raspbery Pi, burn my image on it, and be up and running in no time. Instructions are here: Build your own Plug n Play GIMX emulator using Raspberry Pi
Month: June 2017
Build your own Plug n Play GIMX emulator using Raspberry Pi
This is how you build a GIMX emulator using a Raspberry Pi that you can simply plug your wheel and your console into, and play, without the need for a PC in the middle:
- Buy or build a GIMX adapter: https://blog.gimx.fr/product/gimx-adapter/
- Buy a used Raspberry Pi 1 Model B+, a 2 or a 3: Amazon
- Get a 4GB or larger Micro SD Card: Amazon
- Burn the image gimx_dietpi.img on the SD card using Win32 Disk Imager
- Plug everything in according to this diagram, and you’re ready to go (G27 on PS4).
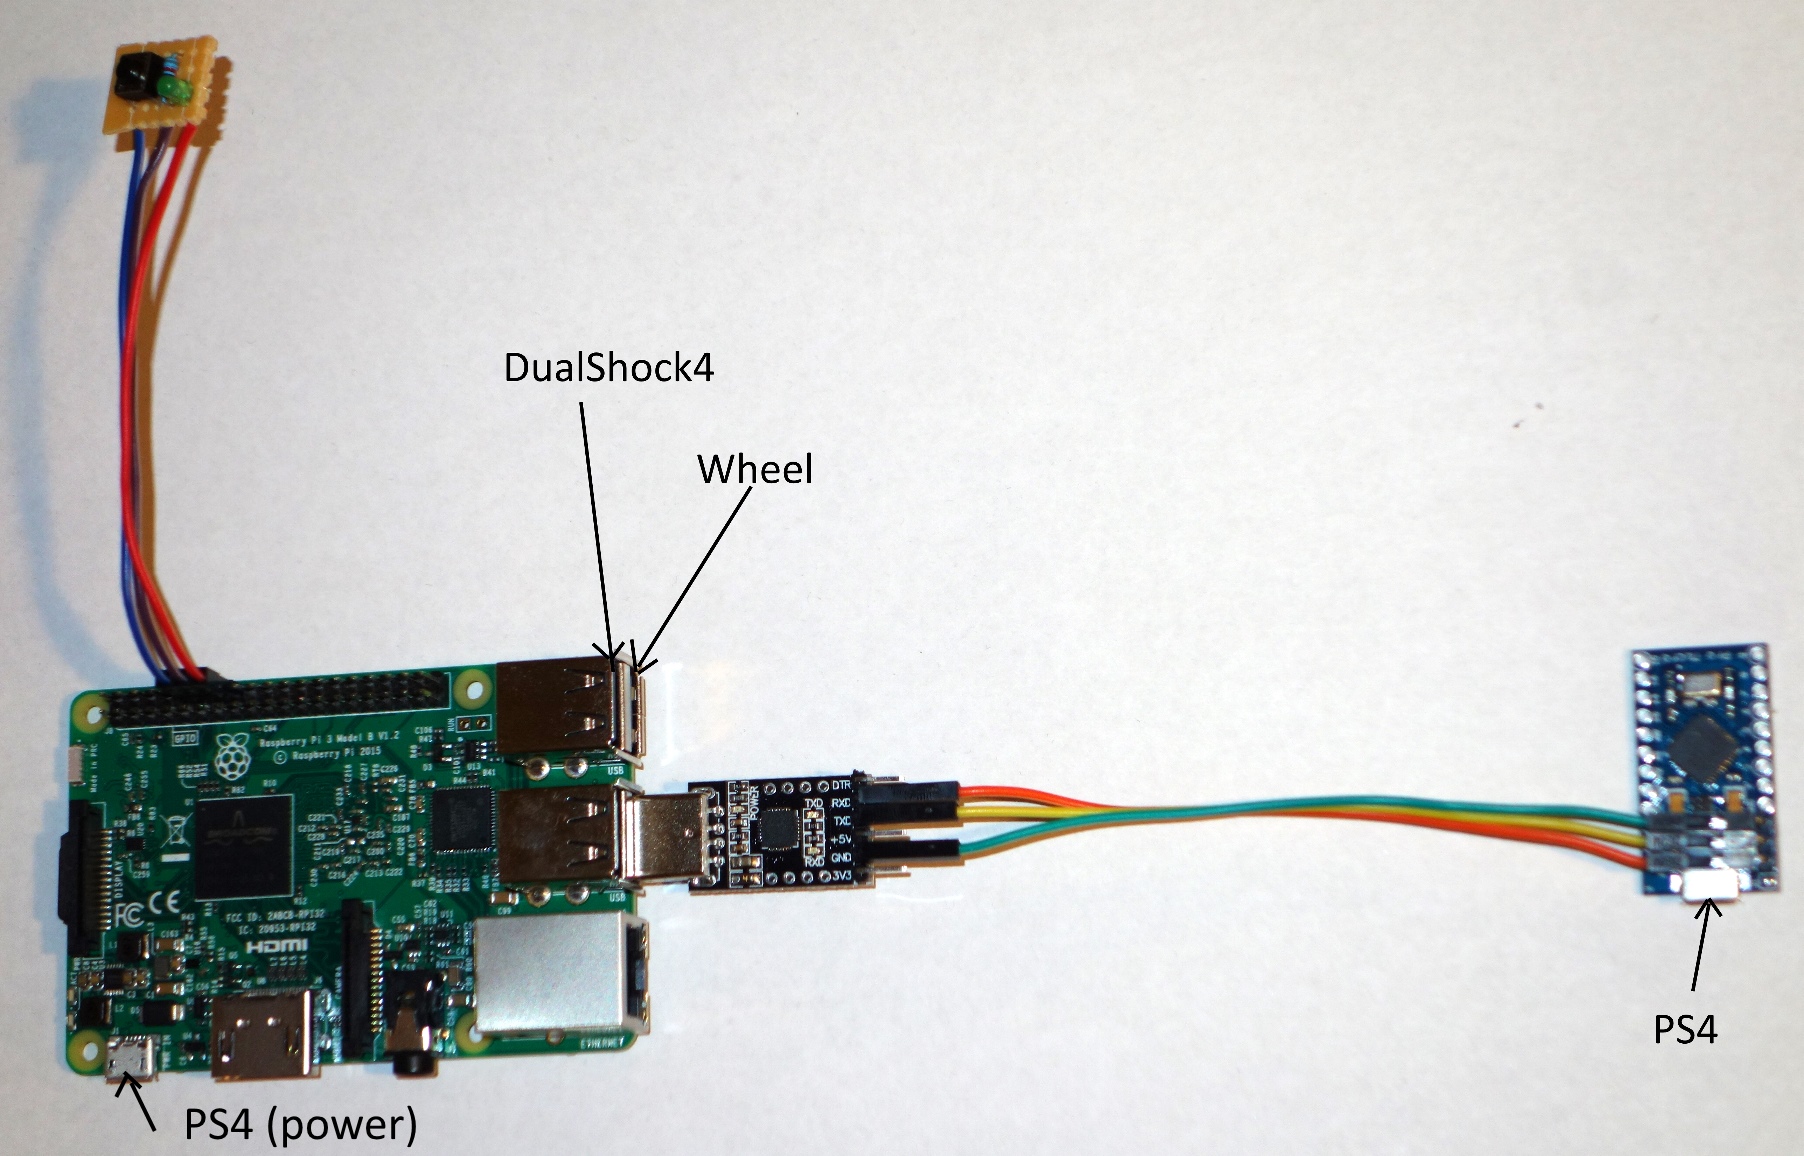
Note: this will only work out of the box with the G27 wheel on PS4. If you need it to work for something else, make sure you order the gimx adapter with the right config for your device, or flash it yourself according to Matlo’s instructions. Then follow my instructions to update the Rpi for your specific device: http://www.steve-marton.com/gimx/?p=237
Extra Points:
- You can buy a cheap raspberry pi case from Ebay
- You can build a small switch and LED on prototype board from Radio Shack. This gives you a status LED to tell you when gimx is up and running, and a power button to shut down the Rpi safely without corrupting the SD card. However, this is not essential, because in the event that your sd card gets corrupted, you can always easily burn the image again. You can look at the pics here for ideas on building the board (I just twist the leads of the components together on the back of the board, then solder): http://www.steve-marton.com/gimx/?product=power-button-with-status-led-for-raspberry-pi . You can glue this to the case if you’d like.
Read my other blog posts if you run into issues, and of course the super helpful docs and forums at gimx.fr.